The results are in: successful home staging can net you significant return on investment when selling your home. According to the National Association of Realtors, for every $100 invested in staging, the return is about $400 (USD).
As far as no-money-down staging, the results are just as good; staged homes sell for 20% more than unstaged homes. Not accounting for non-monetary benefits, like shorter time on the market and for increasing your odds of receiving multiple offers.
So if you’re selling, it’s time to think about staging. Successful home staging, unlike interior design or decorating, isn’t just about style – it’s about marketing. You want potential buyers to walk through your home and see themselves in it. Here are our top tips for staging your home without buying a thing.
Working with What You Have
It’s easy to spend thousands on furniture rentals, accessories, or professional staging when selling your home. And these investments are worthwhile – but the first step to successful home staging is working with what you’ve got.
It helps to take a room-by-room approach and give yourself as much time as possible. Break up the job into room-sized pieces and reward yourself at milestones. Don’t forget that you’re helping yourself in the long run!
De-Clutter and “De-Stuff”
The most common staging advice you’ll hear is to declutter; I’d like to go one step further and recommend moving about a third or more of your things to storage. Off-season clothing, shoes, supplies, books, small appliances – anything you don’t use on the regular should go!
Having fewer things in your closets and cupboards makes your storage appear larger, spaces more open, and your entire home more welcoming.
The real estate market looks a lot different in 2022. Here’s what you need to know:
- Top Up and Coming Neighbourhoods for Families
- Our Top Tips for Downsizing in Toronto
- Refinancing Your Mortgage? Read This First
Clean Thoroughly
It’s a well-worn tip, but still merits mentioning; clean your entire home from top to bottom, and keep it that way. Even little-seen places like inside cupboards, cabinets, and under stairs. Don’t ignore things like dusty house plants, worn carpets, and walls either.
Assess Your Home’s Assets
What are the best features of your home? What are the not-so-nice features? As you de-clutter and clean your home, take stock of the features you’d like to show off, and think about the things that may need hiding. Assessing as you clean can save you time in the long run.
Remove Everything Personal
Religious items, divisive décor, wedding photos, and any other too-personal items need to be removed and put into storage. Even if it’s art to you – these items make buyers remember that it’s someone else’s house, making it harder for them to see themselves in it.
Make Repairs
Tackle your repair list and fix leaky faucets, missing handles or hardware, poorly-hung cabinet doors, loose banisters. When potential buyers see something broken, they wonder what else in your home hasn’t been cared for. Make these easy fixes.
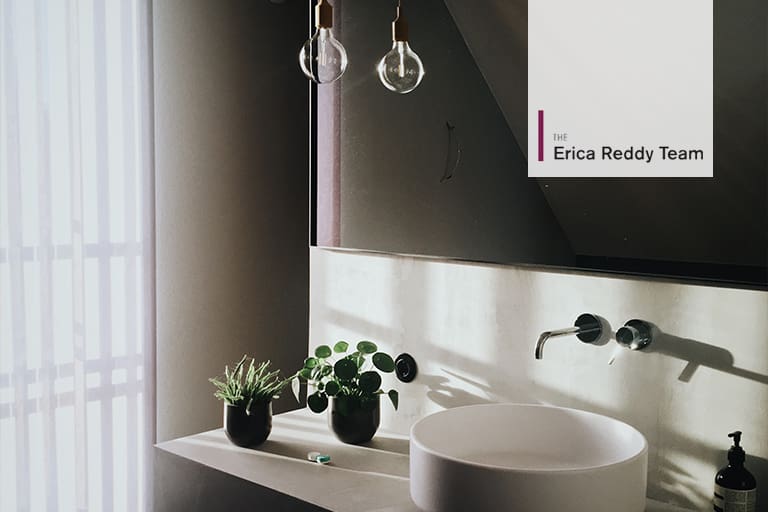
Brighten Up The Space
Remove Drapes (Maybe)
Take a good look at your window treatments. Are they blocking your windows? Do they distract from other features in the room? Would the space look better without it? Removing – or re-framing – your window coverings can make a big difference in brightening up your home, especially in condos with floor-to-ceiling windows.
Clean Windows
Clean windows add a sparkle to a home that you can’t get with lamps. Remove screens where you can, too, and give them a thorough clean.
Up Your Wattage
This is a little-known brightening tip, but switch out your lightbulbs to higher-wattage. High-wattage bulbs can make your place feel extra bright and airy. Just make sure you don’t go over the recommended wattage – you can usually find this information just inside the socket of your lamps or fixtures.
Layer Lighting
There are four different types of lighting: floor-level, mid-level, eye-level, and overhead.
Floor-level lighting is lighting that sits on the floor, like standing lamps. Mid-level lights are task lights, table lamps, and under-counter lighting. Eye-level light comes in the windows, from spotlighted artwork, or wall sconces. Finally, overhead lighting is anything on the ceiling.
Using a variety of layers of lighting adds visual interest and a cheerfulness to your home. It’s great décor, and makes your home feel more bright and spacious. When people come to tour, make sure to turn your lights on!
Paint
You don’t have to paint – sometimes, you’d be just as well-served by getting a few Magic Erasers and thoroughly cleaning your walls. But if you have bold colours or accents walls in your home, I’d recommend painting over them with neutral colours. This breaks our no-purchase recommendation, but painting makes a major difference.
Make A Scene
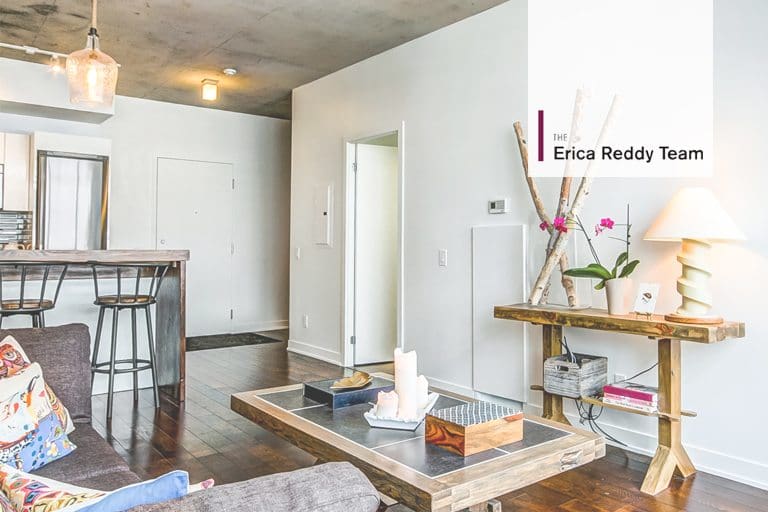
Find The Focal Point
Assign a visual “focal point” to each room. It should be a somewhat central object or feature that draws the eye in. In the kitchen, it may be an island or sink. In the living room, it can be a fireplace or the centre of a seating arrangement. Whatever it is, choose your focal point and arrange the room so that your eye moves easily from object to object, and settles on the focal point.
Use Your Chairs
Accent and occasional chairs are some of your best pieces for building visual interest around your focal point. Set them in empty corners that need a little something, arrange them around a fireplace for a comfy-looking vignette, or use them to draw your eye to the centre of a seating arrangement. Extra points for a fluffy pillow or throw blanket, too.
Room Flow
Note the entrances to each room, and how traffic flows around your furniture. Is it easy to maneuver around? Does the room visually flow? Making it easy for buyers to walk around your space is incredibly important for showing how well laid-out your home is. No walkway should be too cramped or tricky.
Accessorize
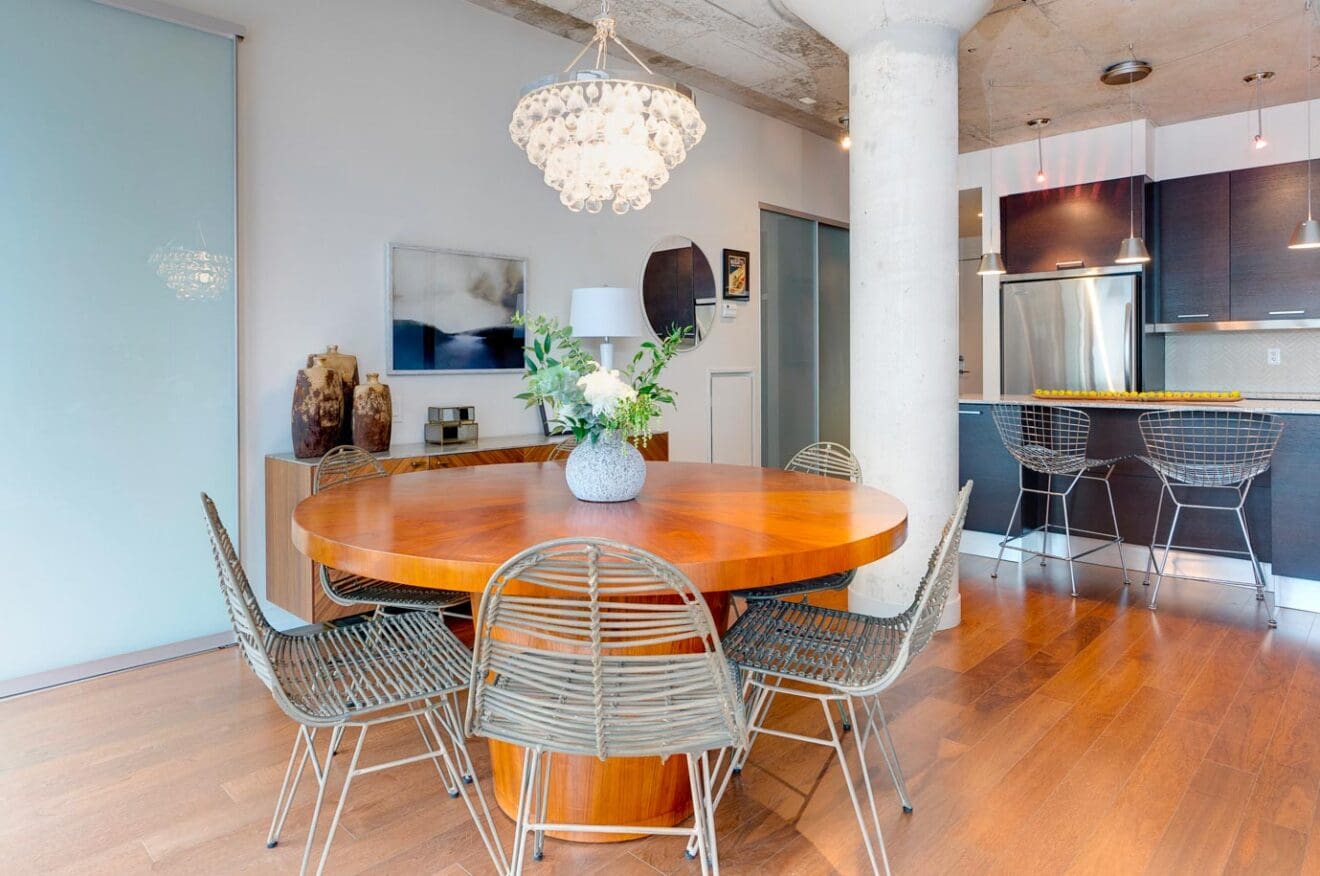
Odd Numbers Are King
Group artful features like planters, coffee table books, and decorative accessories in groups of three or five. Studies show that odd groupings are more visually appealing, and add interest to a space or a piece of furniture. Sticking closely to this rule isn’t a necessity, but it can help you pull off a professional look with ease.
Height and Weight
Another tip for grouping accessories is to layer height, weight, and width of your items. Three tall, column-like objects don’t make for an interesting arrangement. But a stack of books, with a decorative item placed on top of them, next to a taller vase with flowers, looks clean and professionally-staged. When grouping things in three try to use one tall item, one horizontal item, and one item that ties the others together. Voila, easy groupings!
Think in Vignettes
A vignette is a “small illustration or portrait photograph that fades into its background without a definite border”. When it comes to staging, vignettes are settings you create with your furniture and objects that help a buyer imagine a specific, pleasant moment happening there.
Think about table setting your bar-height countertops, or putting a book and a pair of reading glasses on a bedside table. These little scenes help buyers imagine enjoying tranquil and idyllic moments in your home.
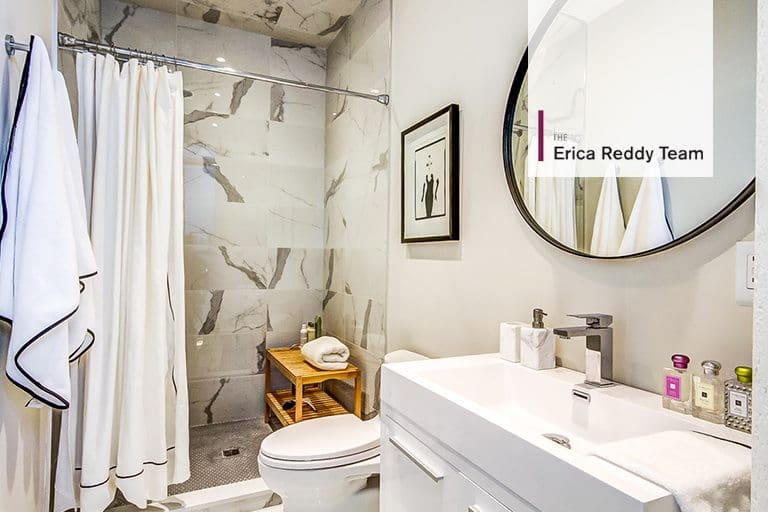
Carpet Smart
Rugs and carpets can help define a space, frame your home’s features, and draw visitor’s eyes to your focal point. But they can also hide desired features (like hardwood flooring) or make a room look small when used incorrectly.
Style your carpets smartly: For smaller rugs, place them underneath coffee tables (but keep the legs of the couch off of them), under a breakfast nook, or as hallway runners.
For medium-sized rugs, you can put the front legs of your couches and chairs on them but have the back legs hanging off. Just keep it consistent in each arrangement. I wouldn’t recommend having a half-off, half-on placement of a rug under a dining set, though.
For large rugs, you can put all of the legs of your furniture on it. Just make sure you have at least six to eight inches of space between the rug and the wall, so buyers can see what your floor is made of.
Display Shelving
Staging your shelving can be tricky. First, remove personal and less-than-decorative items like collections, CDs, or heavy-looking objects. Then fill in some of the space with softer decorative items like vases, interesting bowls, or baskets. Keep balance in mind, and try to style the entire shelf in a way that is pleasant but not distracting.
Consider A Professional
Successful home staging, while different from interior decorating or design, is a qualified skill that takes years of experience to do well. If you’re pressed for time, consider hiring a pro or a real estate agent who offers staging as part of their services.
Our team offers staging services for every client, because we understand how important it is for getting the best price for your home. Instead of investing your time and money into staging, work with a pro to do it for you! When you hire our team, we’ll run you through the entire staging process from start to finish.
If you’d like to know more about how we can help you with successful home staging, contact us today! Call us at 416.443.0300 email us at Erica@ericareddy.com, or contact us here to get started!
Meet The Erica Reddy Team
Find out how our specialized skill sets and extensive Toronto market expertise empower your real estate venture.